
Magnification for Making
comment : 1
Using Magnification To ‘Make’
I’ve been looking at the art-making potential of the Exo Lab scope over the past couple of weeks. In exploring ideas for the creative classroom, it’s obvious that there is real potential in this device to enhance opportunities to create rich learning experiences across teaching areas.
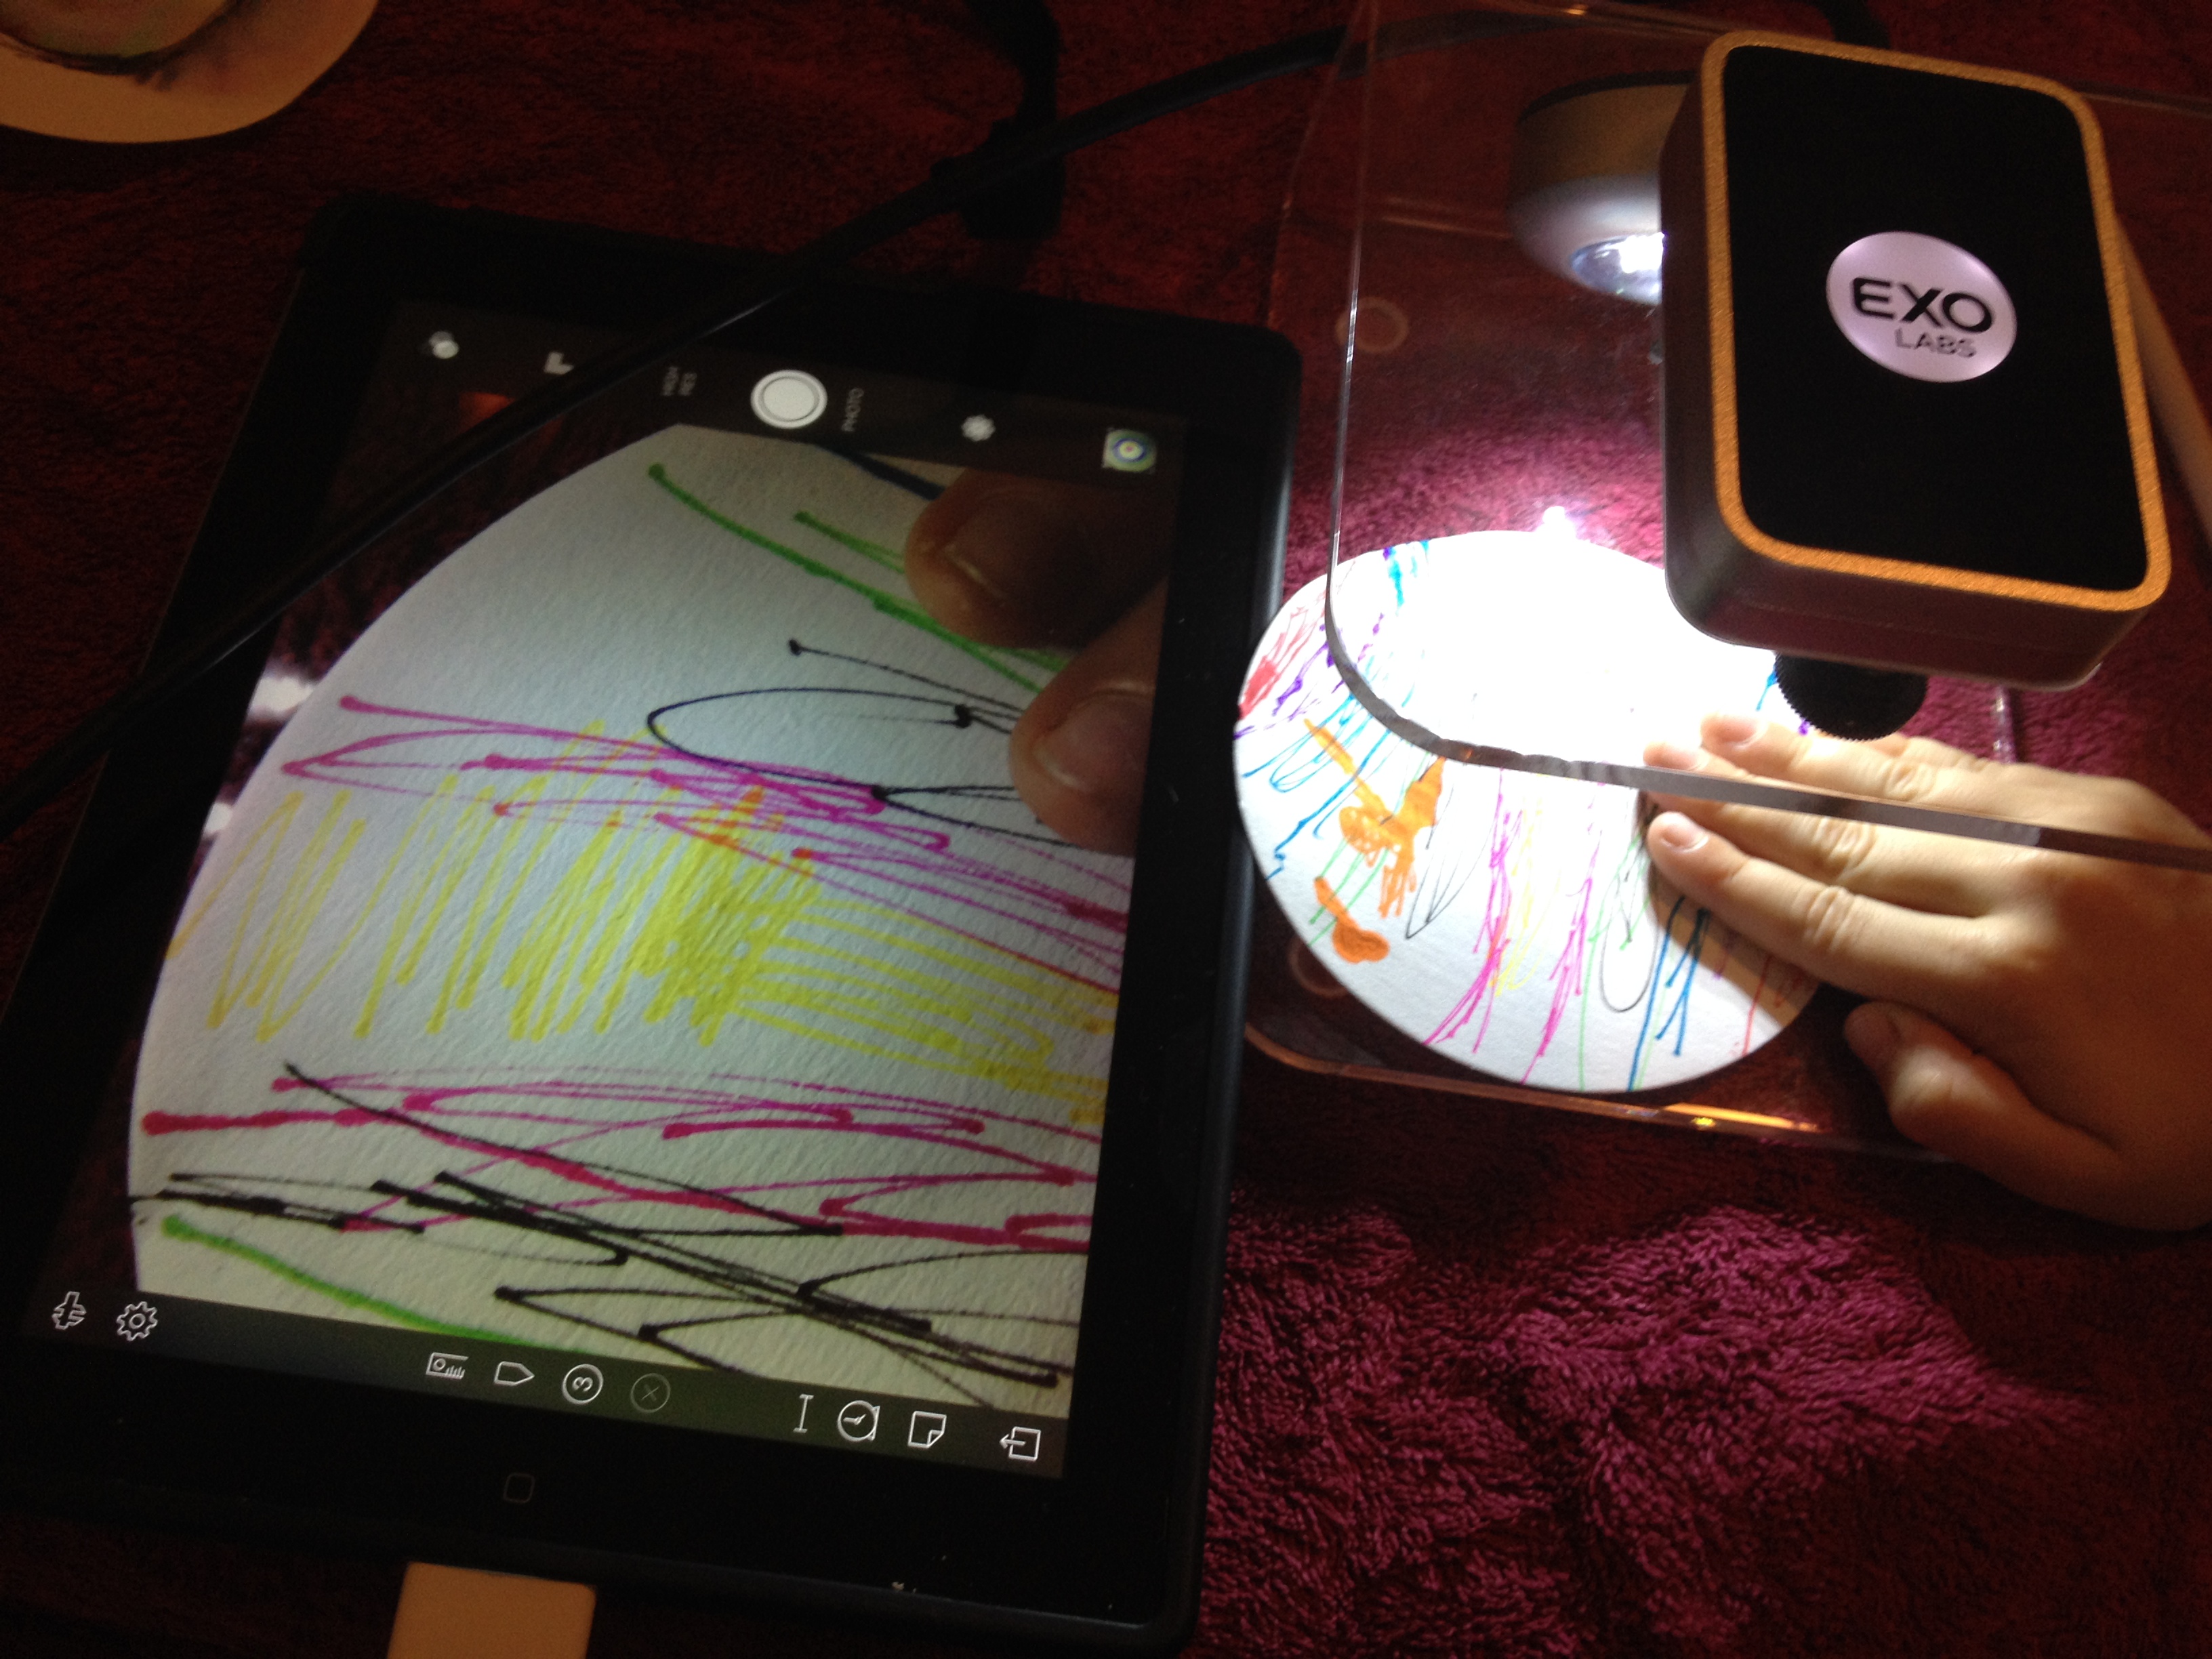
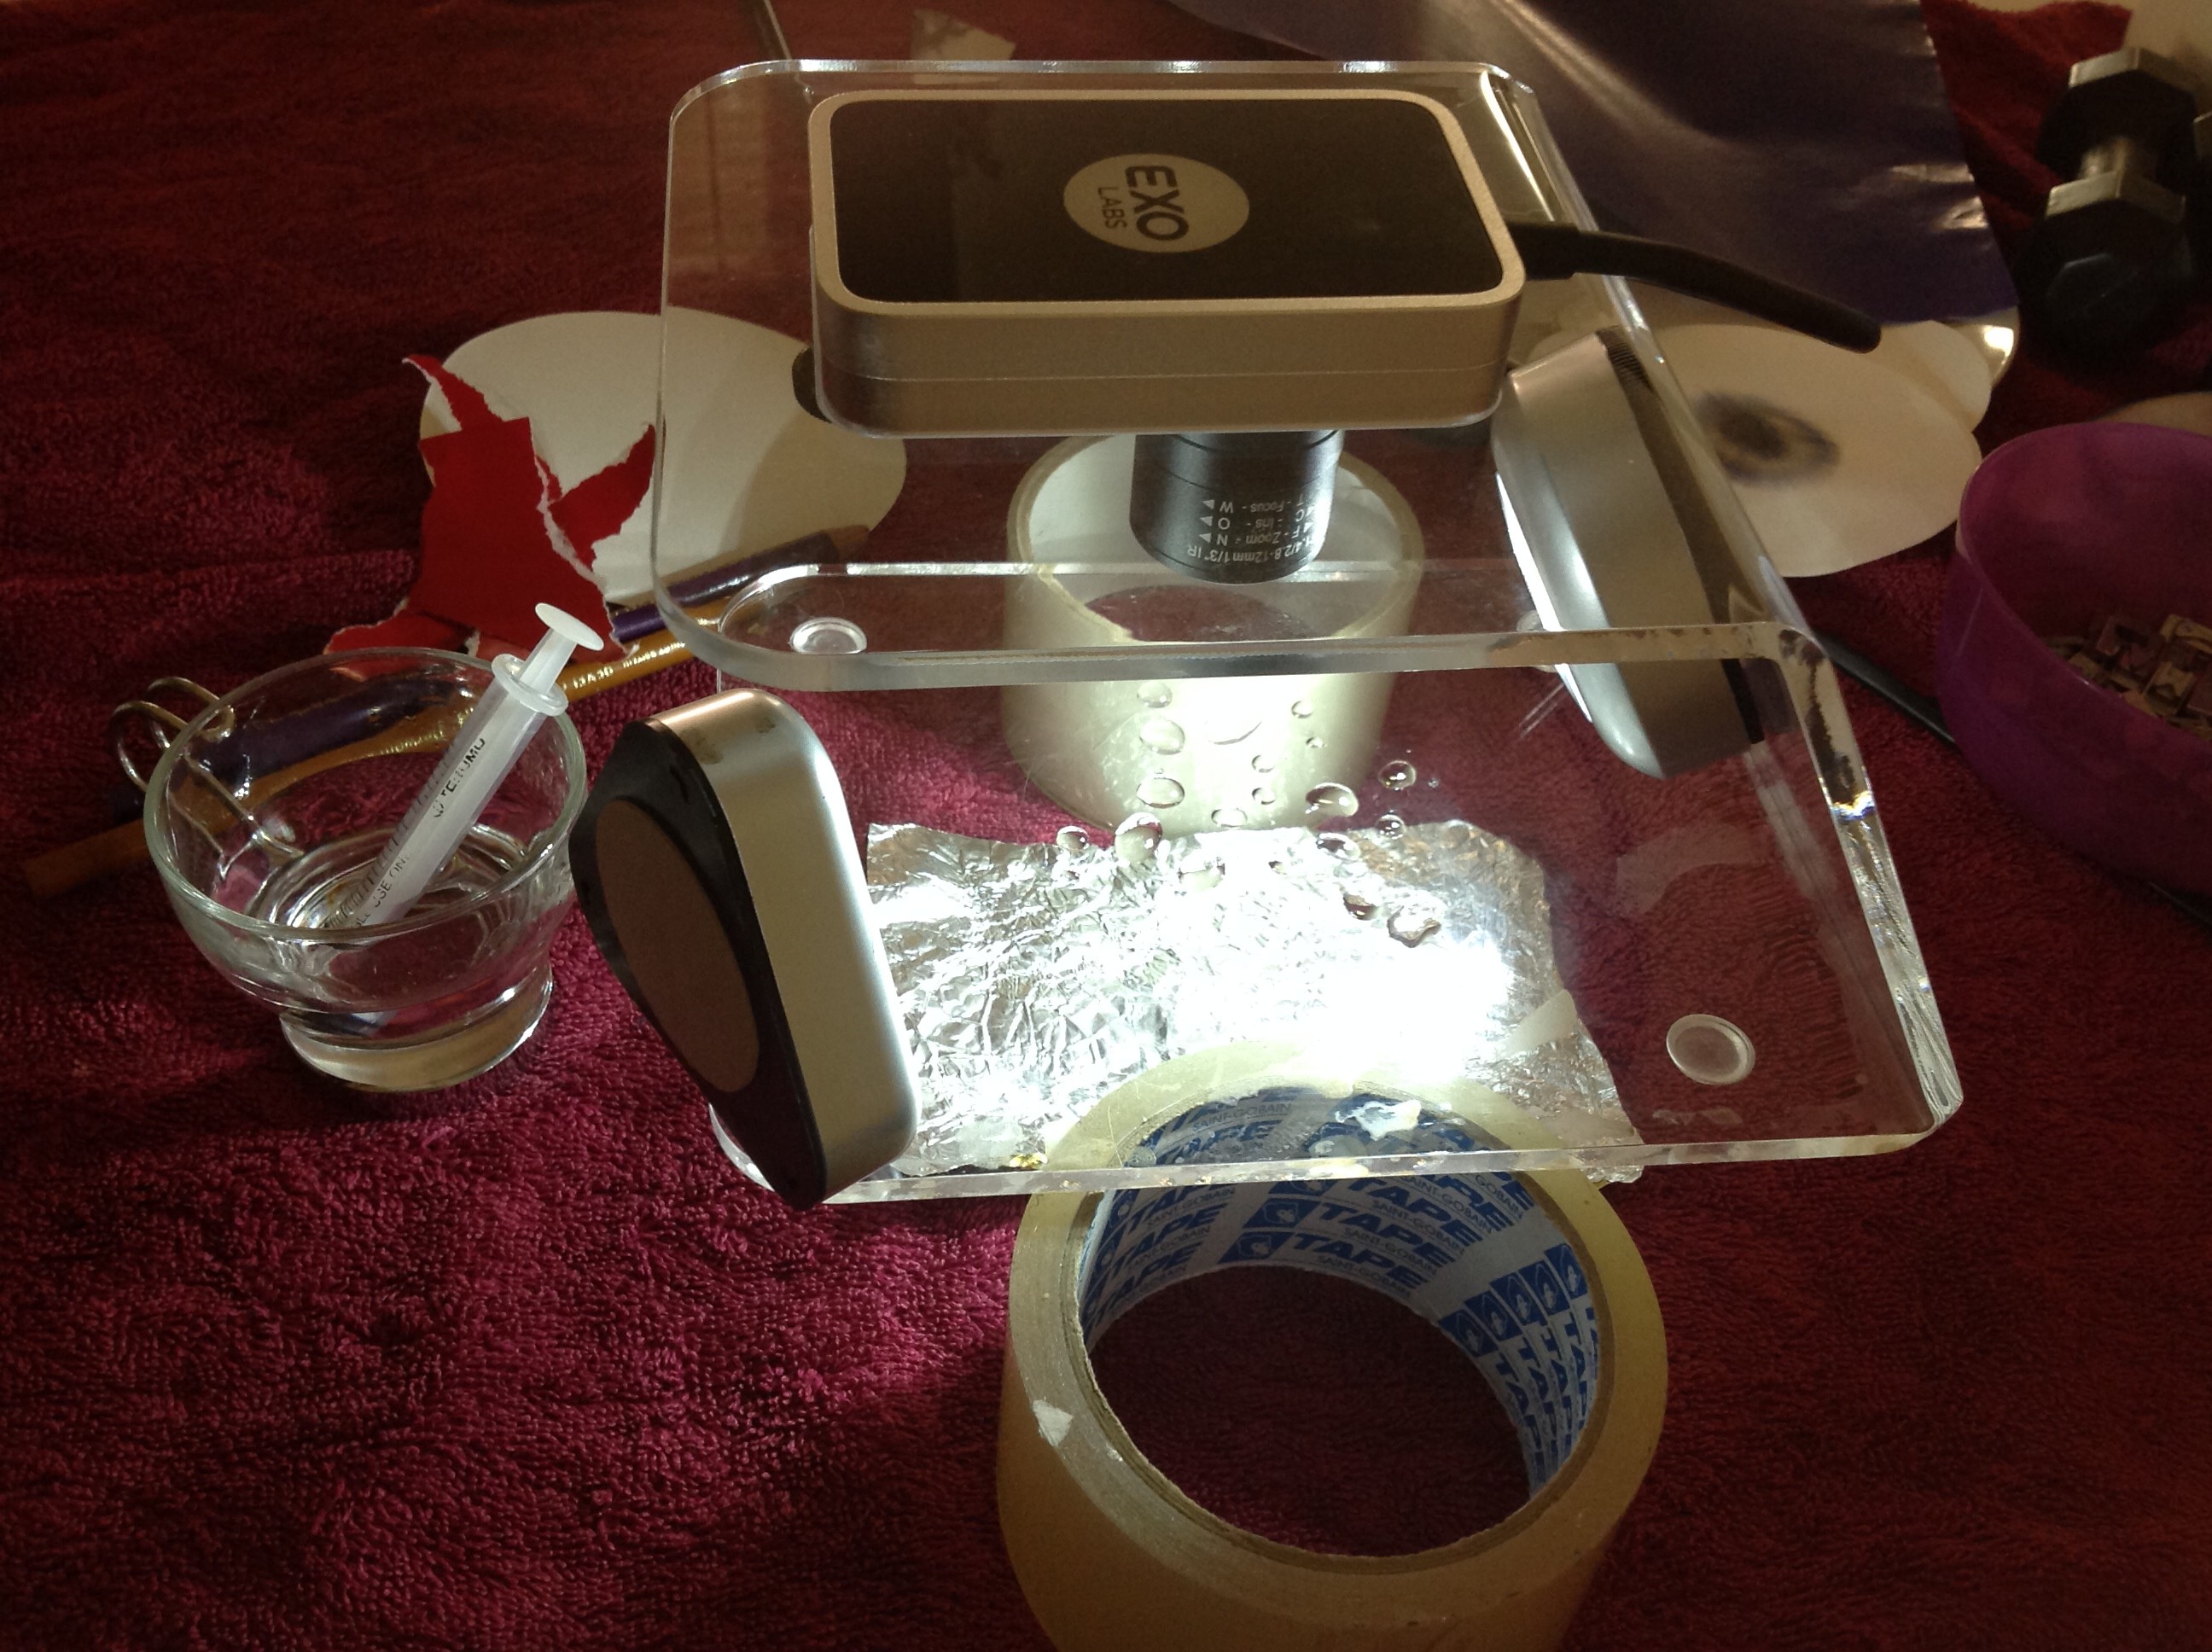
So here’s the scope (below). It’s so easy to use – you simply connect it to your iPad and start exploring using an app that couples with the camera. You can take photographs, time-lapse, video recordings, make annotations and measurements… In this project I am using the pictured ‘Discovery Stand’, which allows you to get up-close, but there are attachments that go into a microscope too. We used those to investigate ‘The World’s Smallest Monster Drawing‘ a few weeks ago.
Why make art using magnification? Because it is awesome!
You can use the scope for so many things, but here’s an idea…try raising the stand up and use the clear, perspex base as a tool.
The following collection of images was created during experimental image construction in response to ‘water’ as a concept/focus/stimulus. To get students thinking about the possibilities and their own area of exploration using water, here are some ‘idea starters’ we’ll float (pun intended) in class…
What is water?
Changing states: Solid, liquid and gas
Shape shifter: Using containers and filling space
Does water has a personality? Think rapids, a drip, tsunami, etc
Power vs passive – A response to nature
Water as a catalyst for creation
What happens when water… ?
Living liquid – What is in that water?
The key method in this series centred on using the clear perspex base of the Discovery Stand as a tool to create depth in the compositions (as shown in picture above). Drops of water have been dribbled onto the surface and in the space under the base I’ve experimented with a variety of drawings, textures and surfaces. The distance between the two levels/surfaces was manipulated, as was the focal point for the camera. The lighting was also crucial, so in addition to using the LEDs on the stand I added another set in a variety of locations and at times used a sharp ‘spot light’ using a torch.
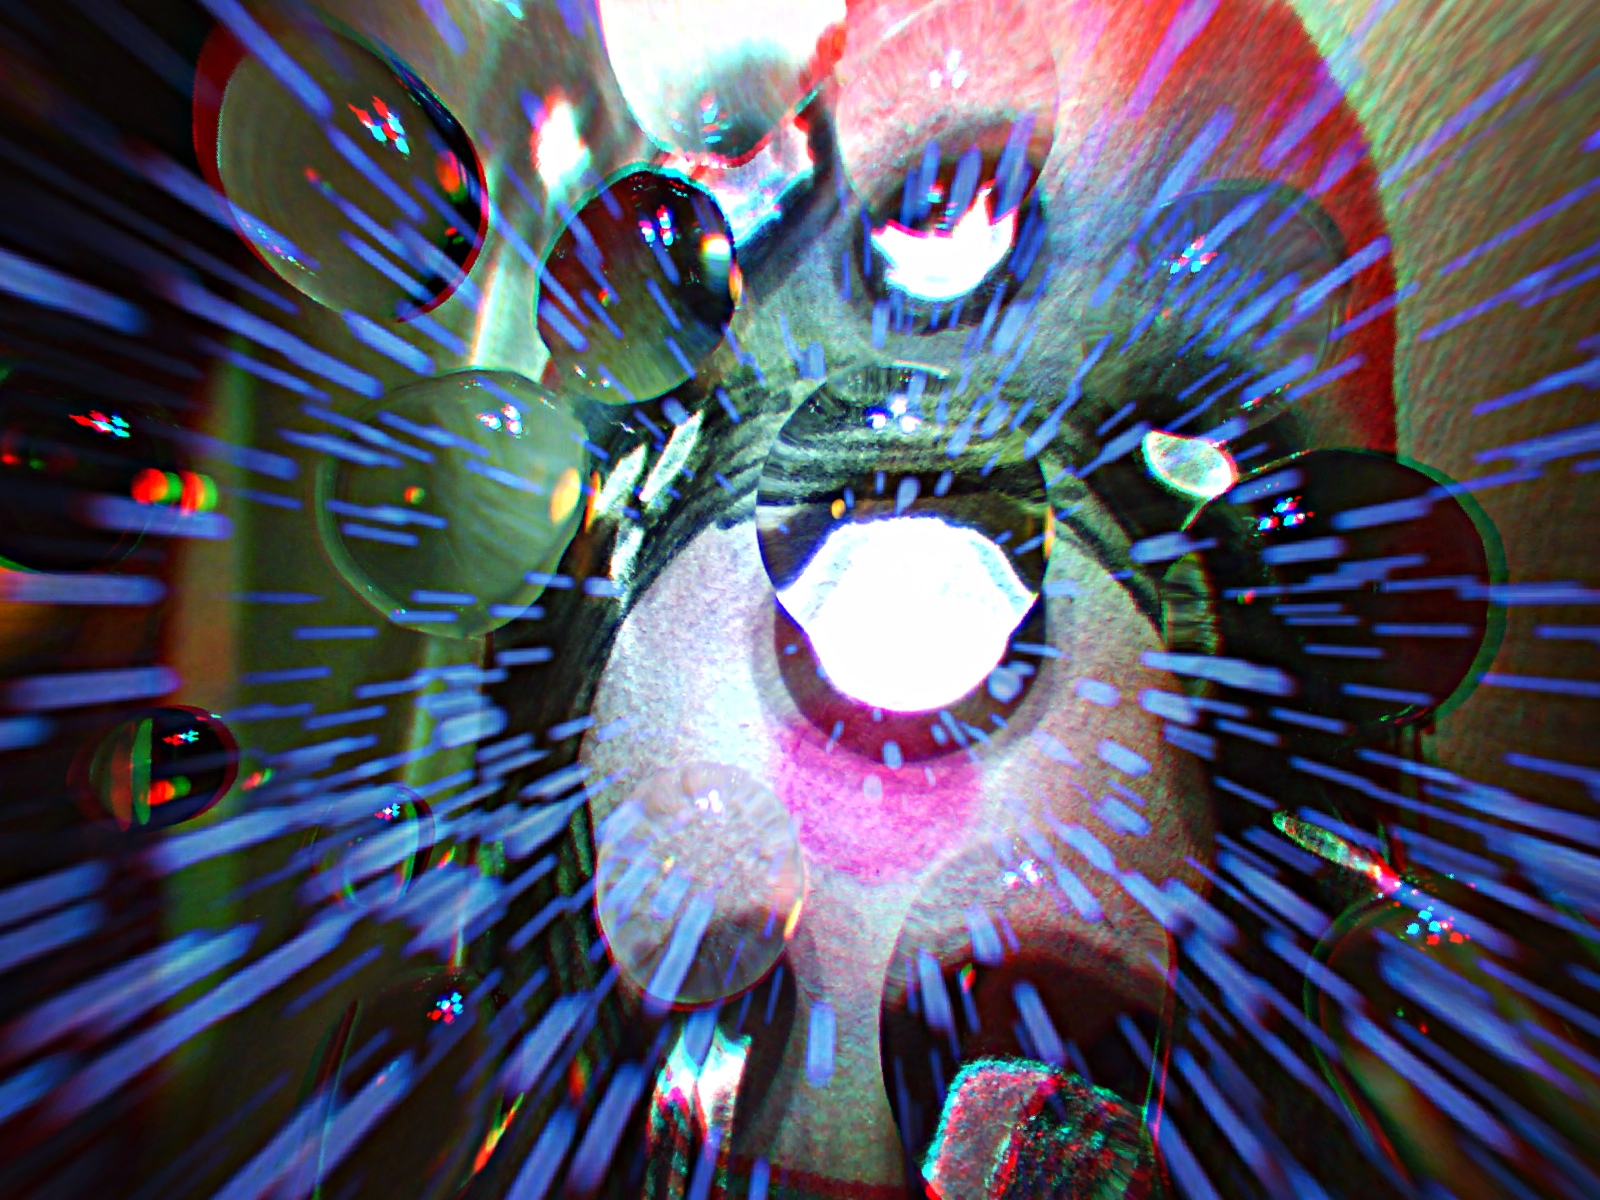
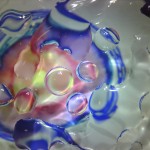
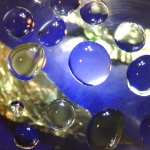
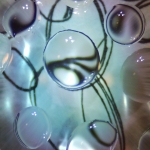
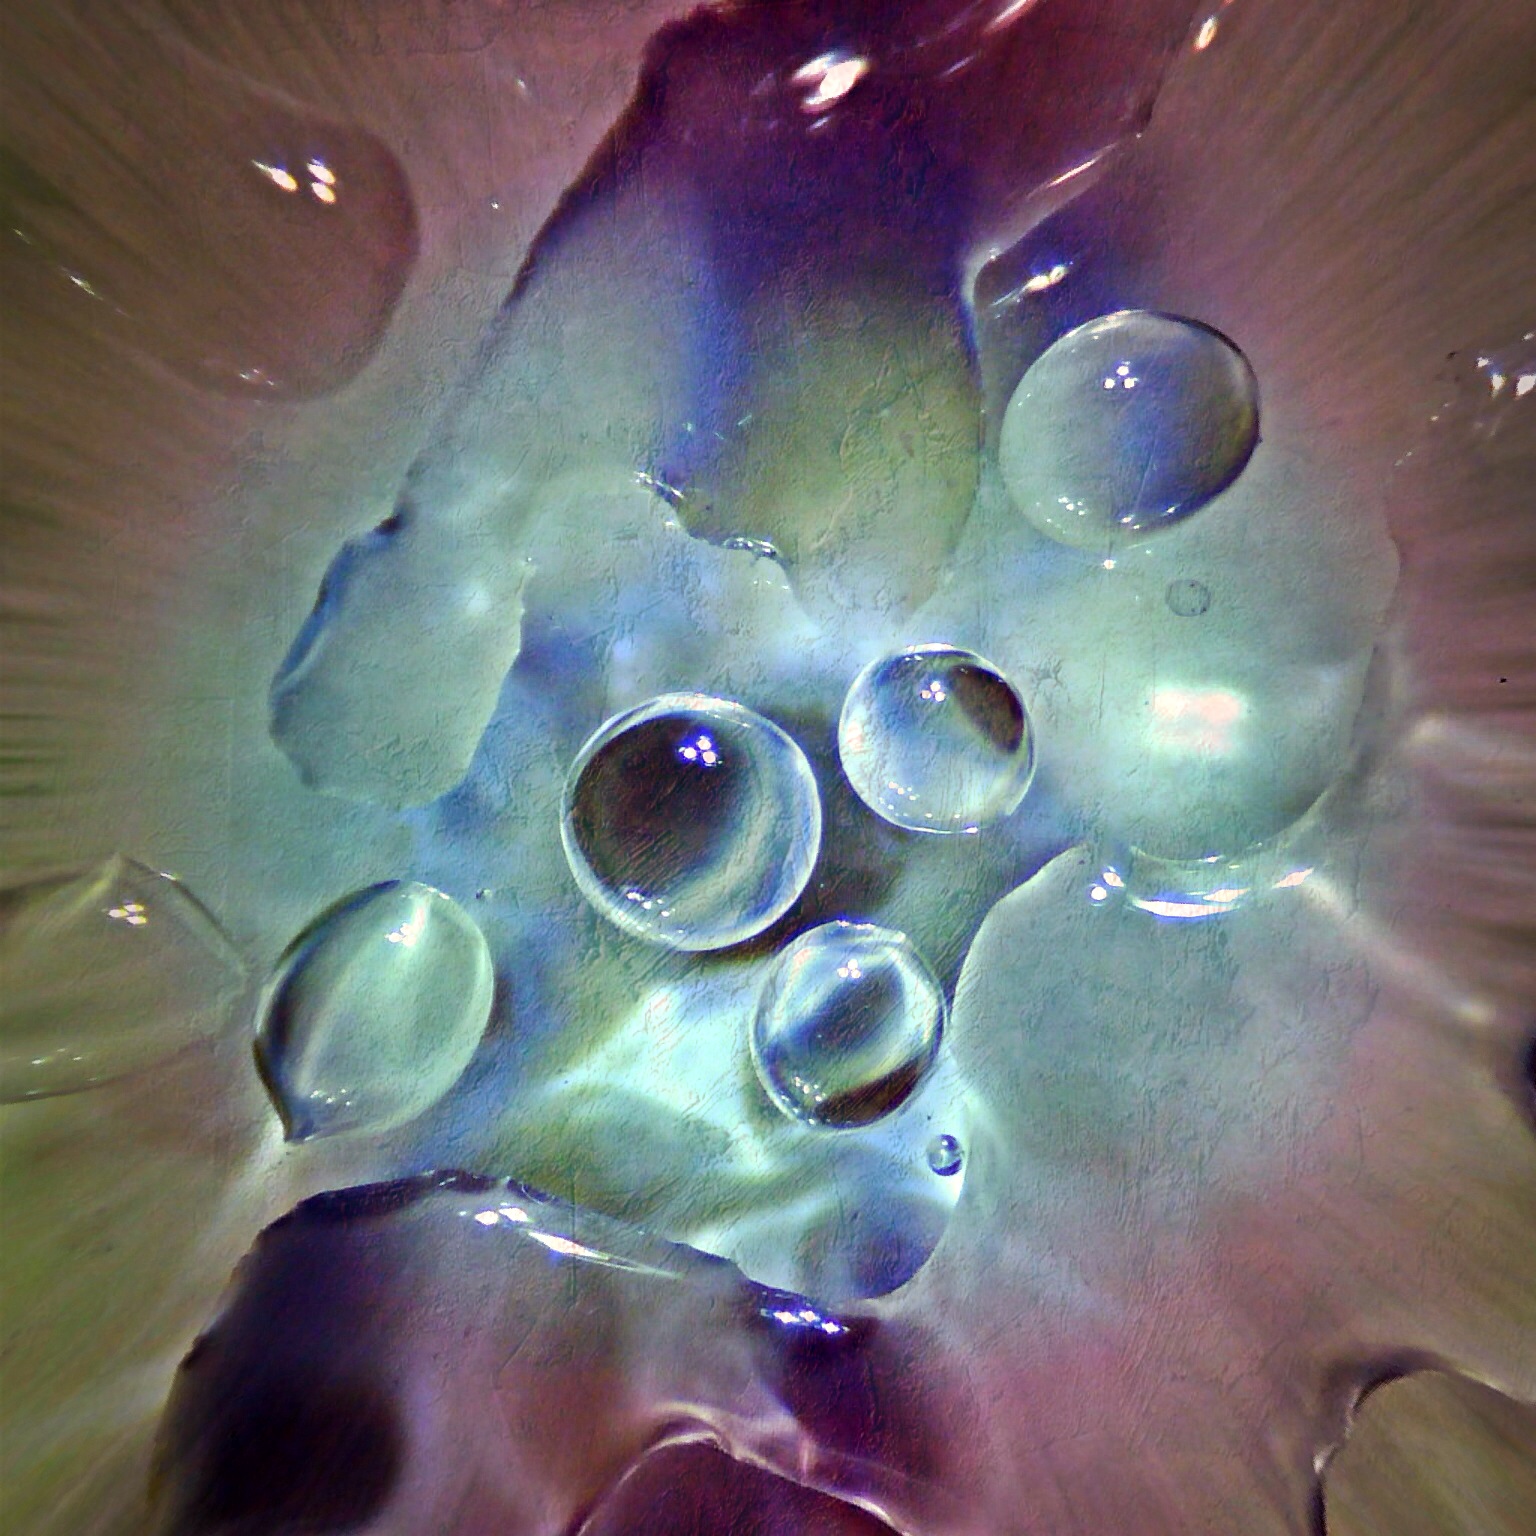
The image below is straight off the Exo Lab camera, no manipulations or post-production at all, so you can start to get a feel for the possibilities. The water is in focus, while some coloured easter egg foil about 10cm below the base of the stand (it is raised off the table as in the picture above) provides the depth. There’s a suggestion of a horizon line, created with the edge of the foil to enhance the illusion of floating bubbles. I also created a crude light box, working with some more foil around the water to reflect coloured light onto the round forms.

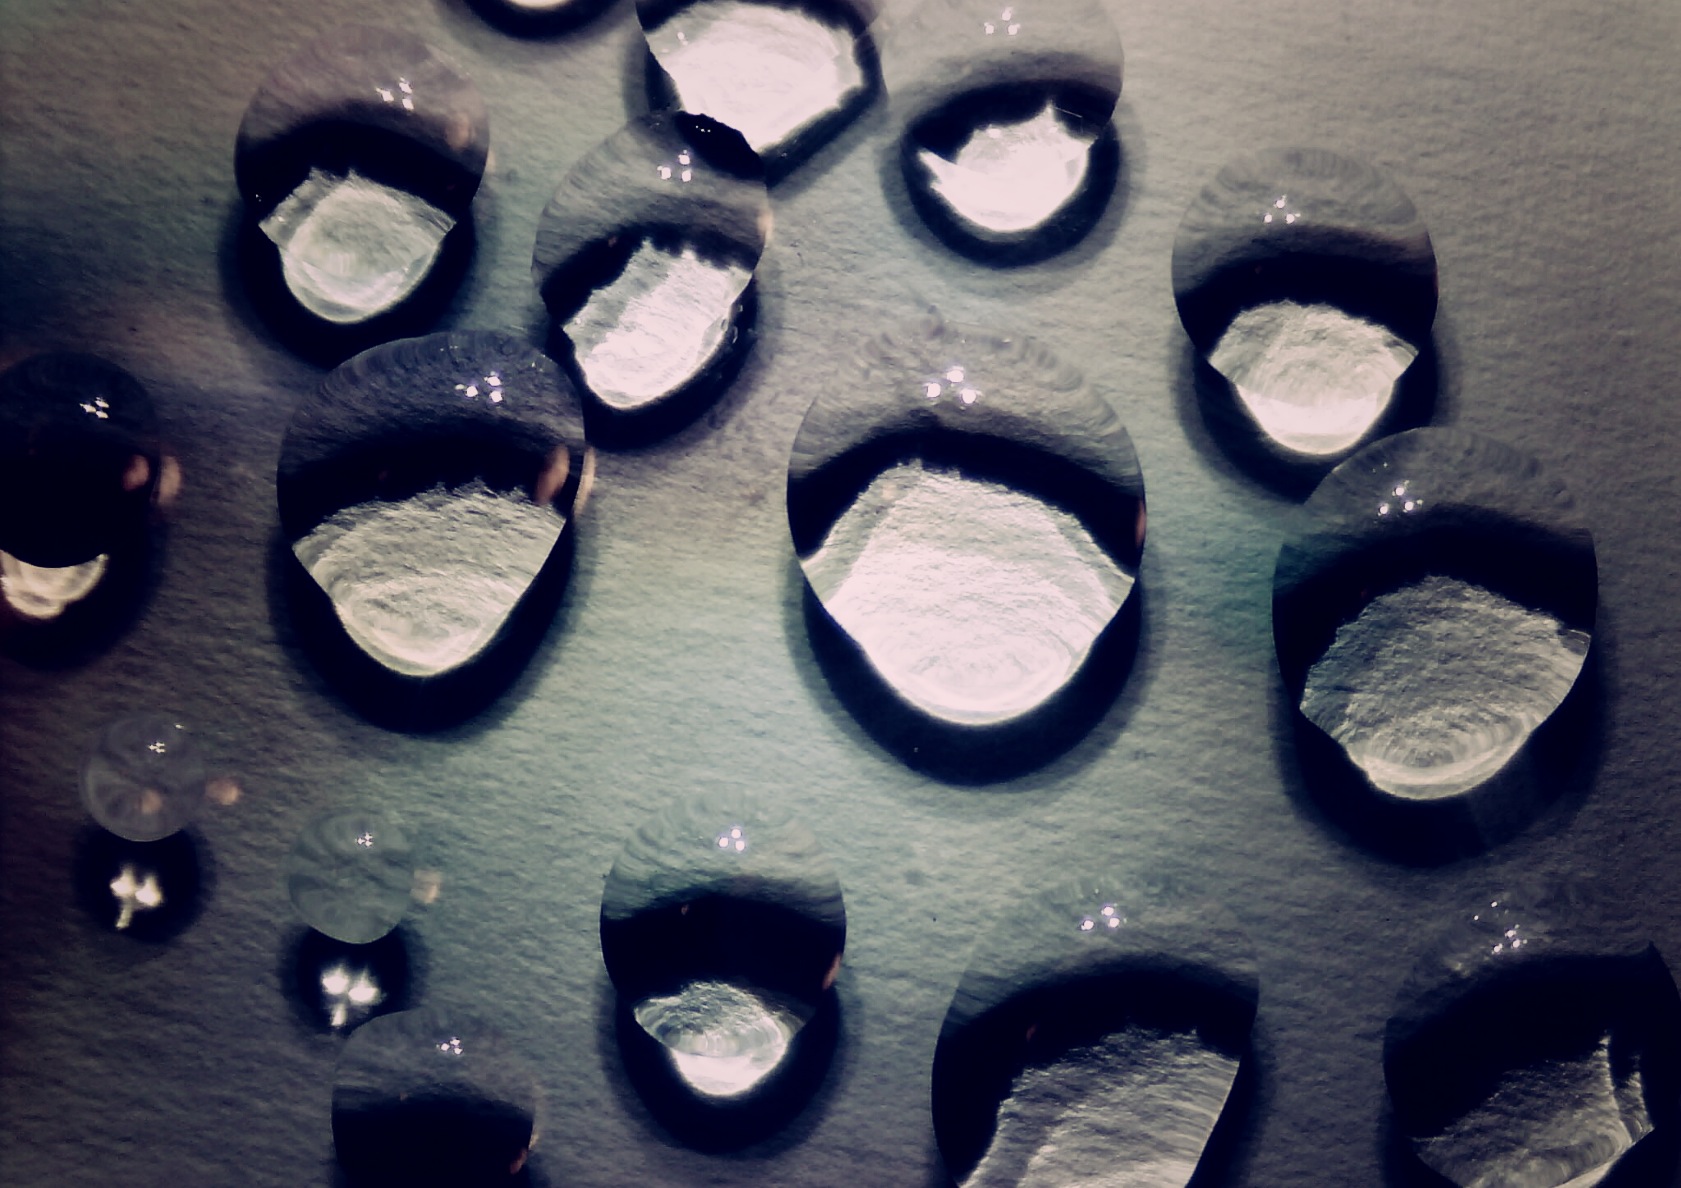
Here’s some other ‘raw’ images, created using reflected colours (from paper, drawings and foil) and the water droplets.
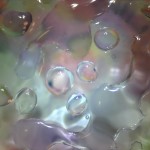
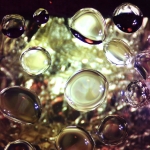
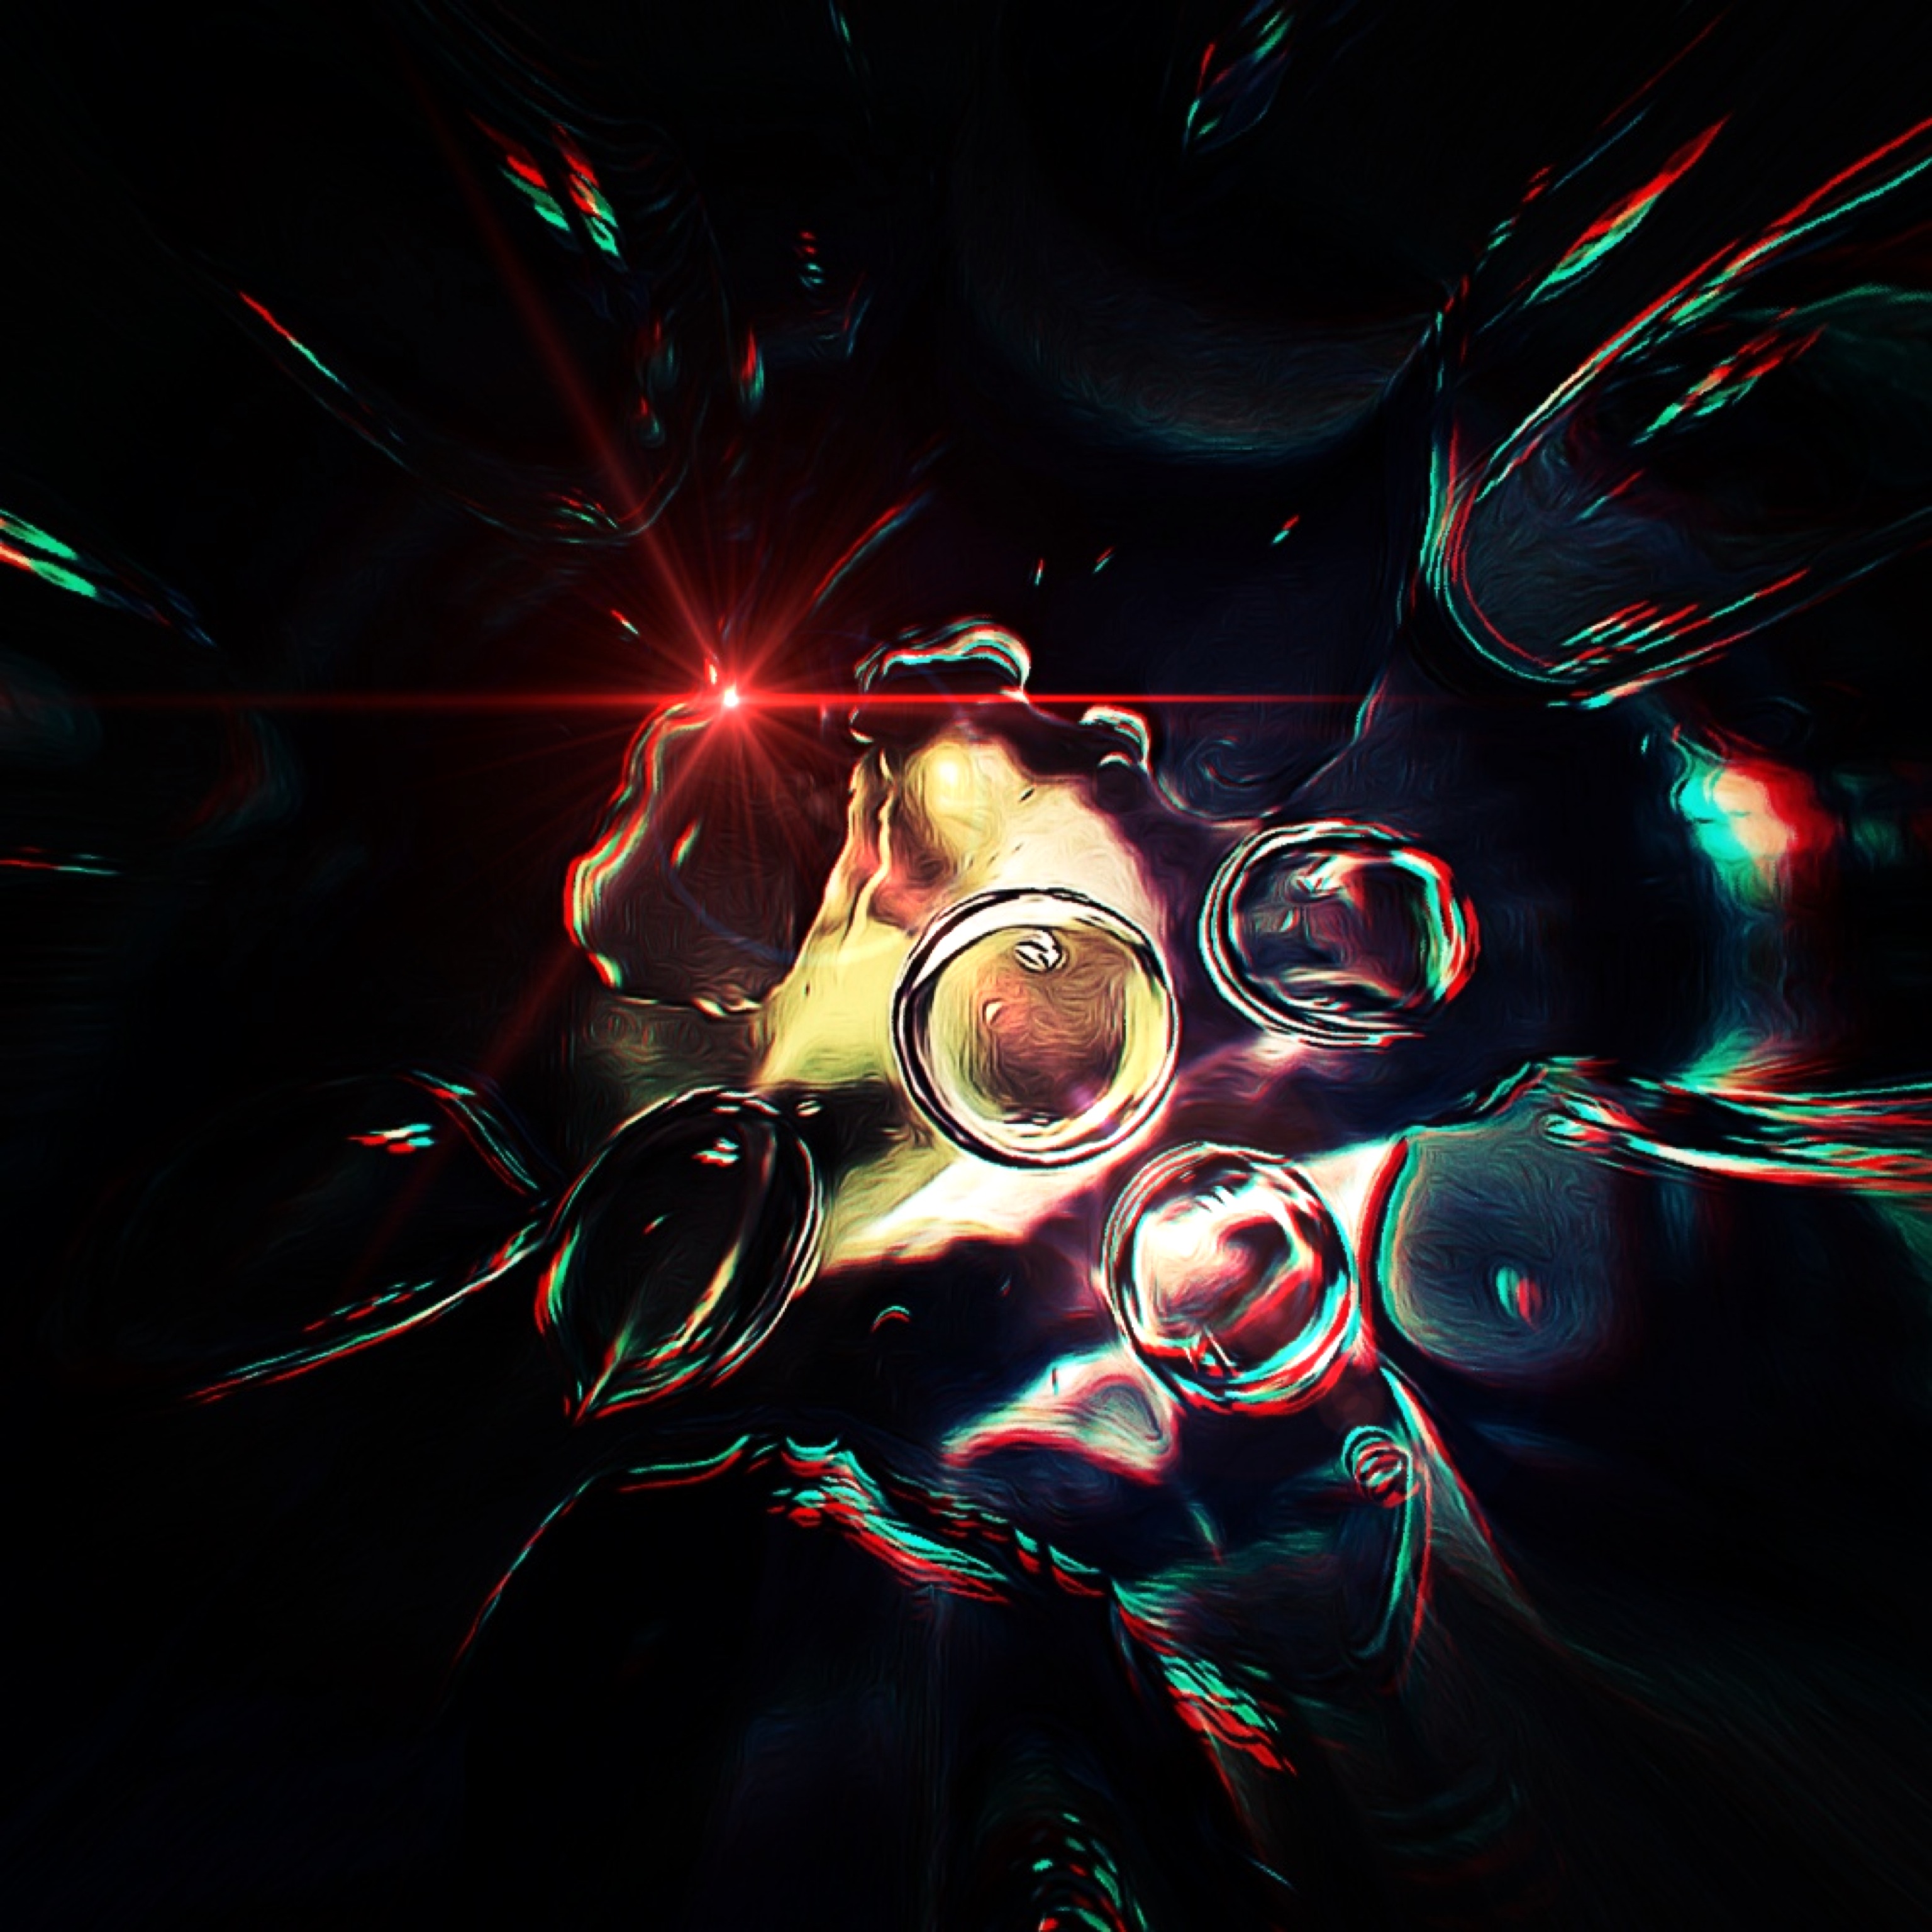
The images below were produced in the same way, with a bright ‘burn’ around the central bubbles created with a torchlight spotting the droplet. The reflected colour came from closely positioned easter egg foil. All three of these images have had no correction or clean up, there’s just a slight hint of a filter layer applied from a central point to enhance the colour.
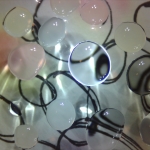
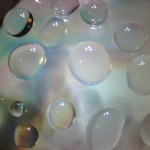
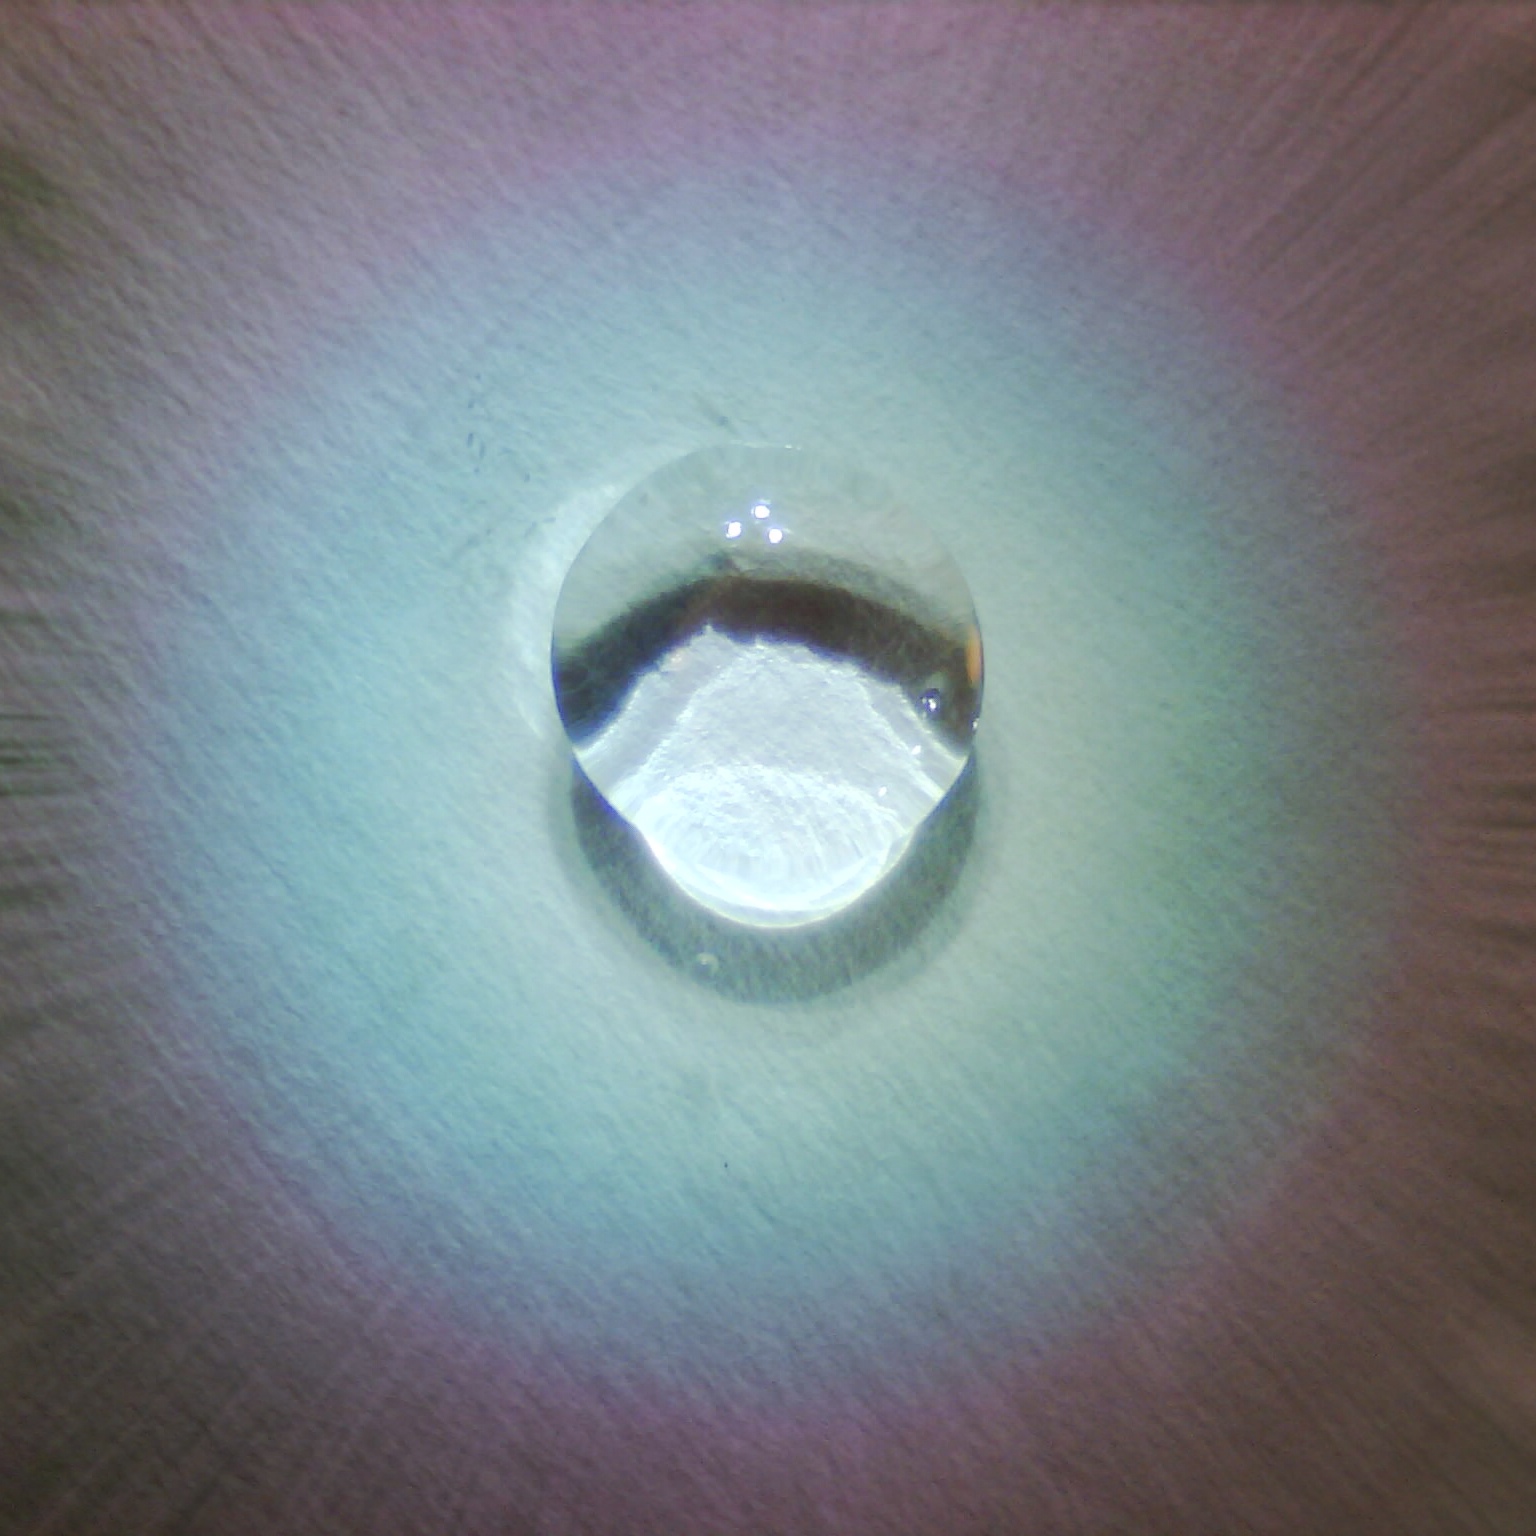
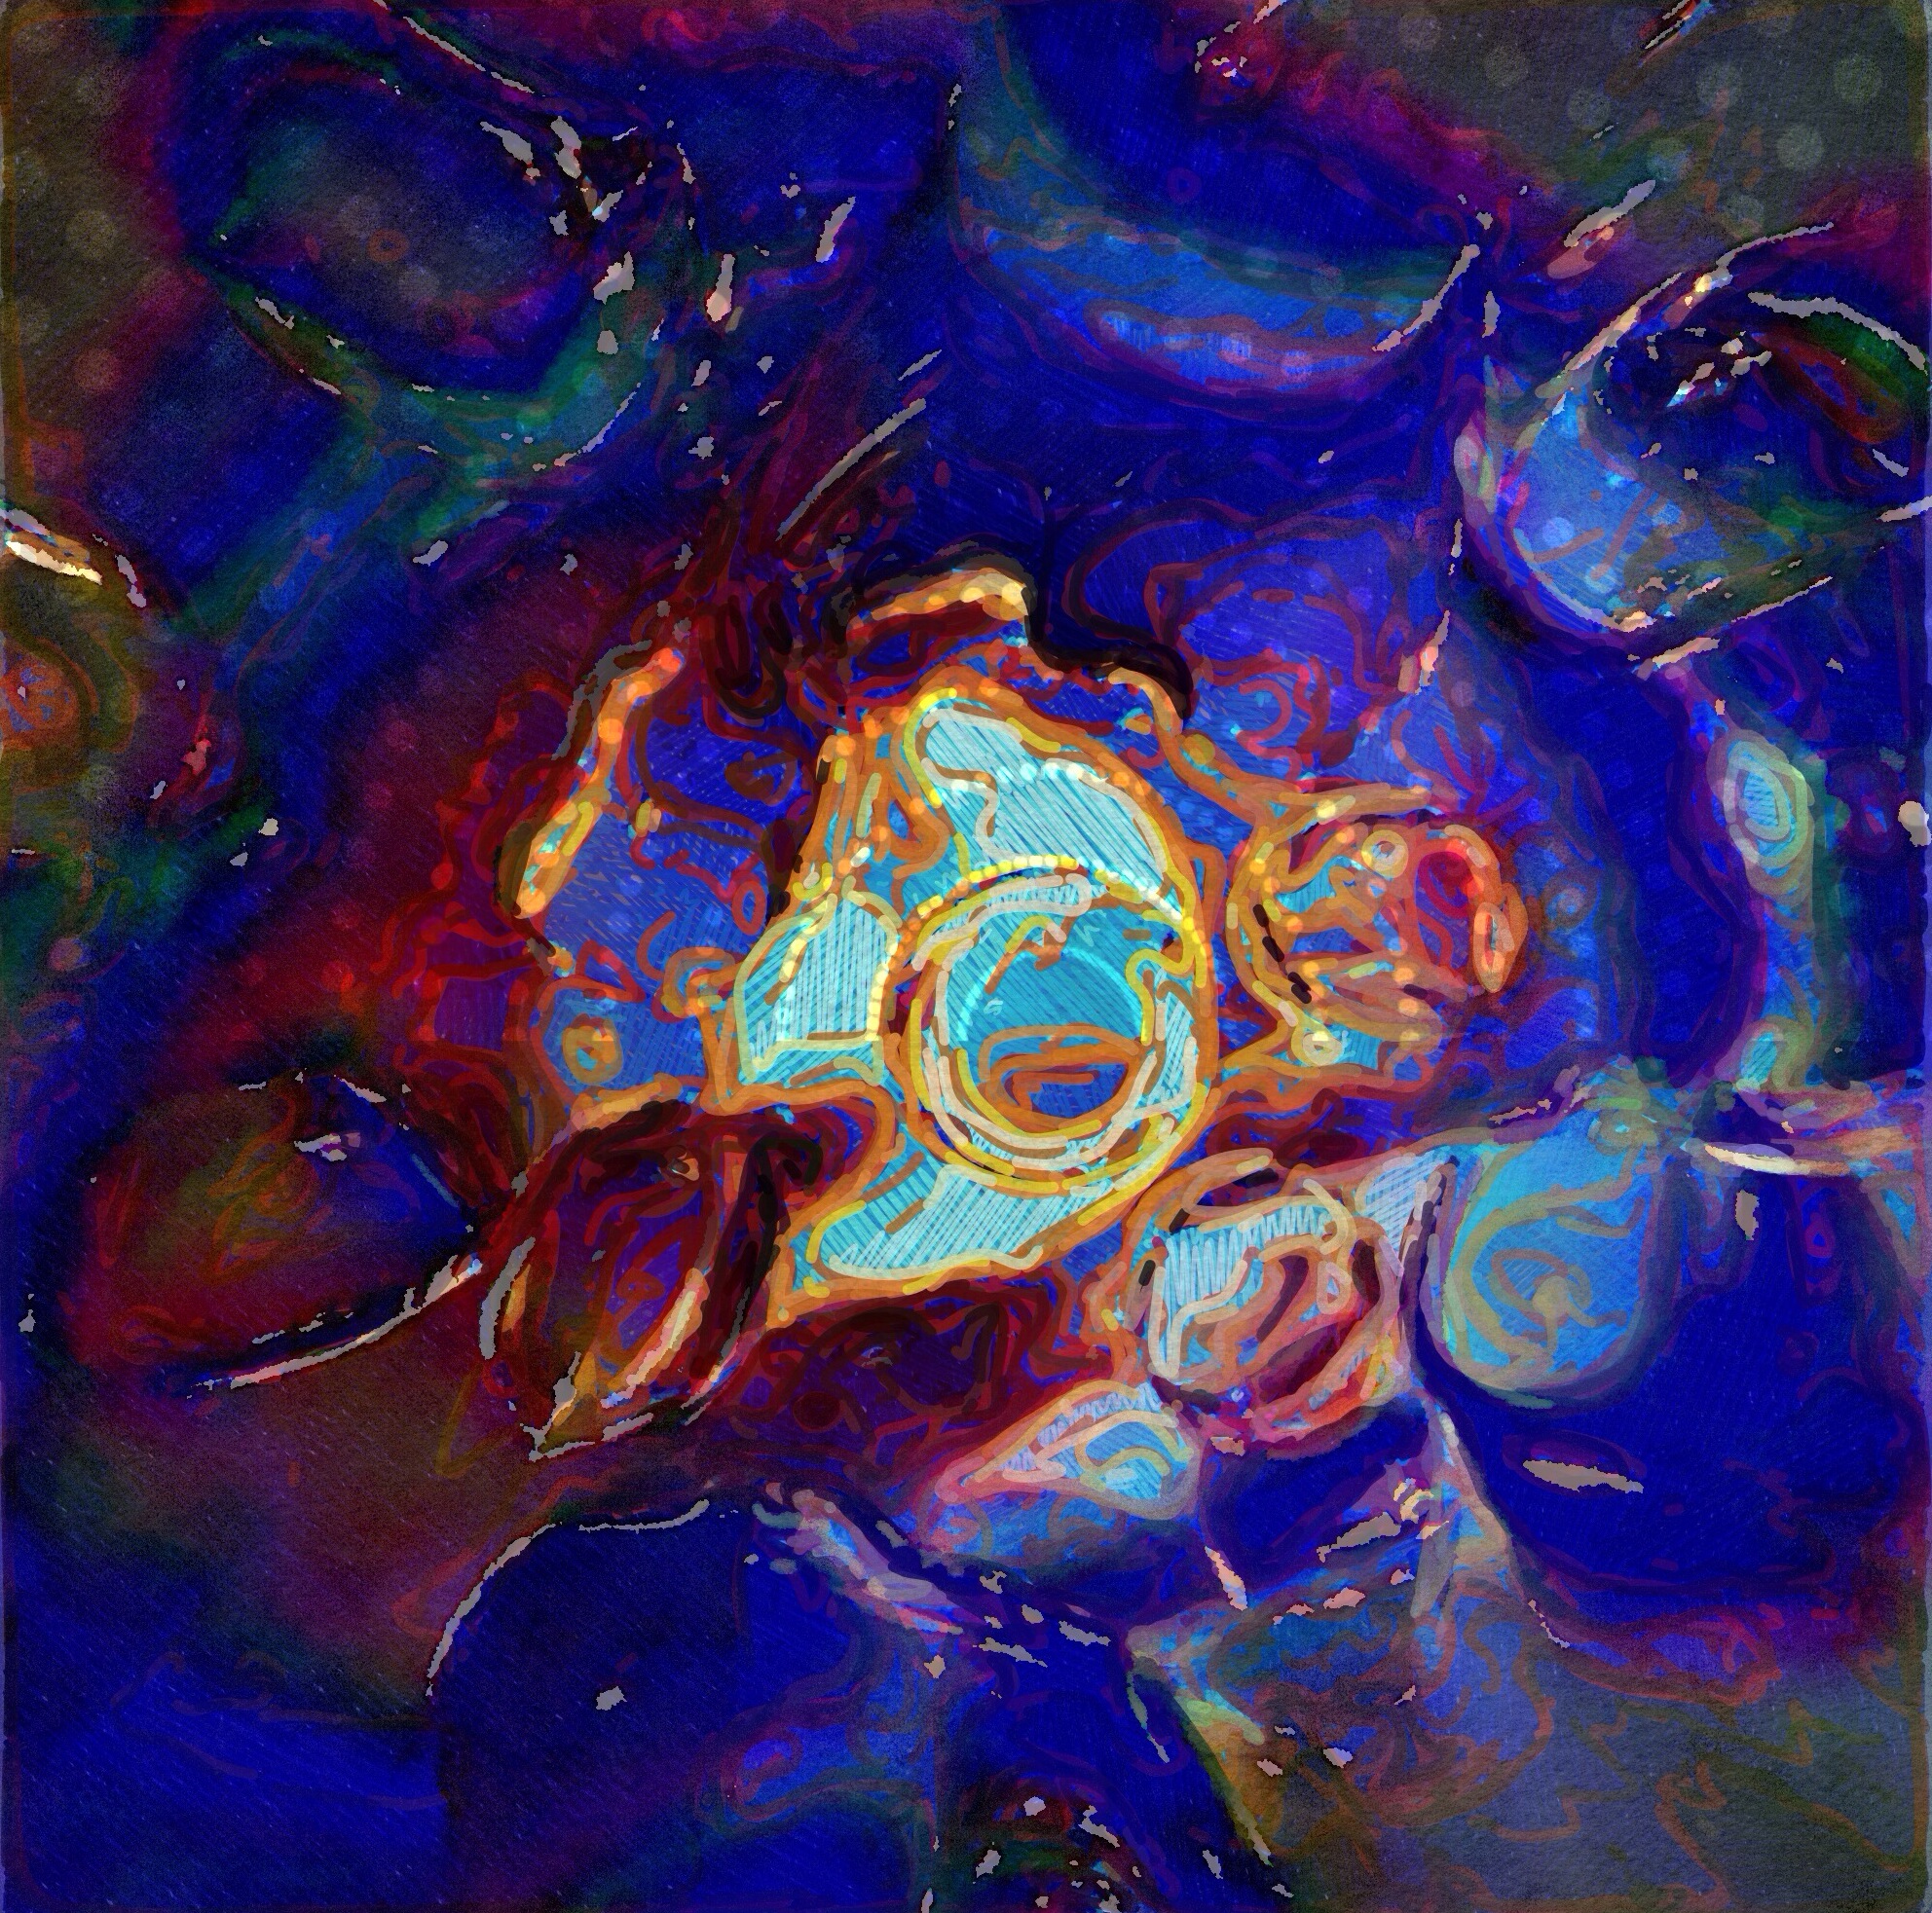
This image was taken straight off the camera and a single filter applied gently to enhance the spot light effect that was initially created using a torch. The texture of the paper provides a contrast to the slick water surface. The shadows created with the paper positioned hard against the thick, perspex underside of the stand base enhances the spherical shape of the water – it was actually very flat.
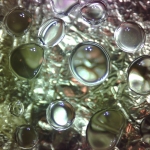
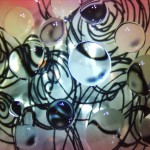
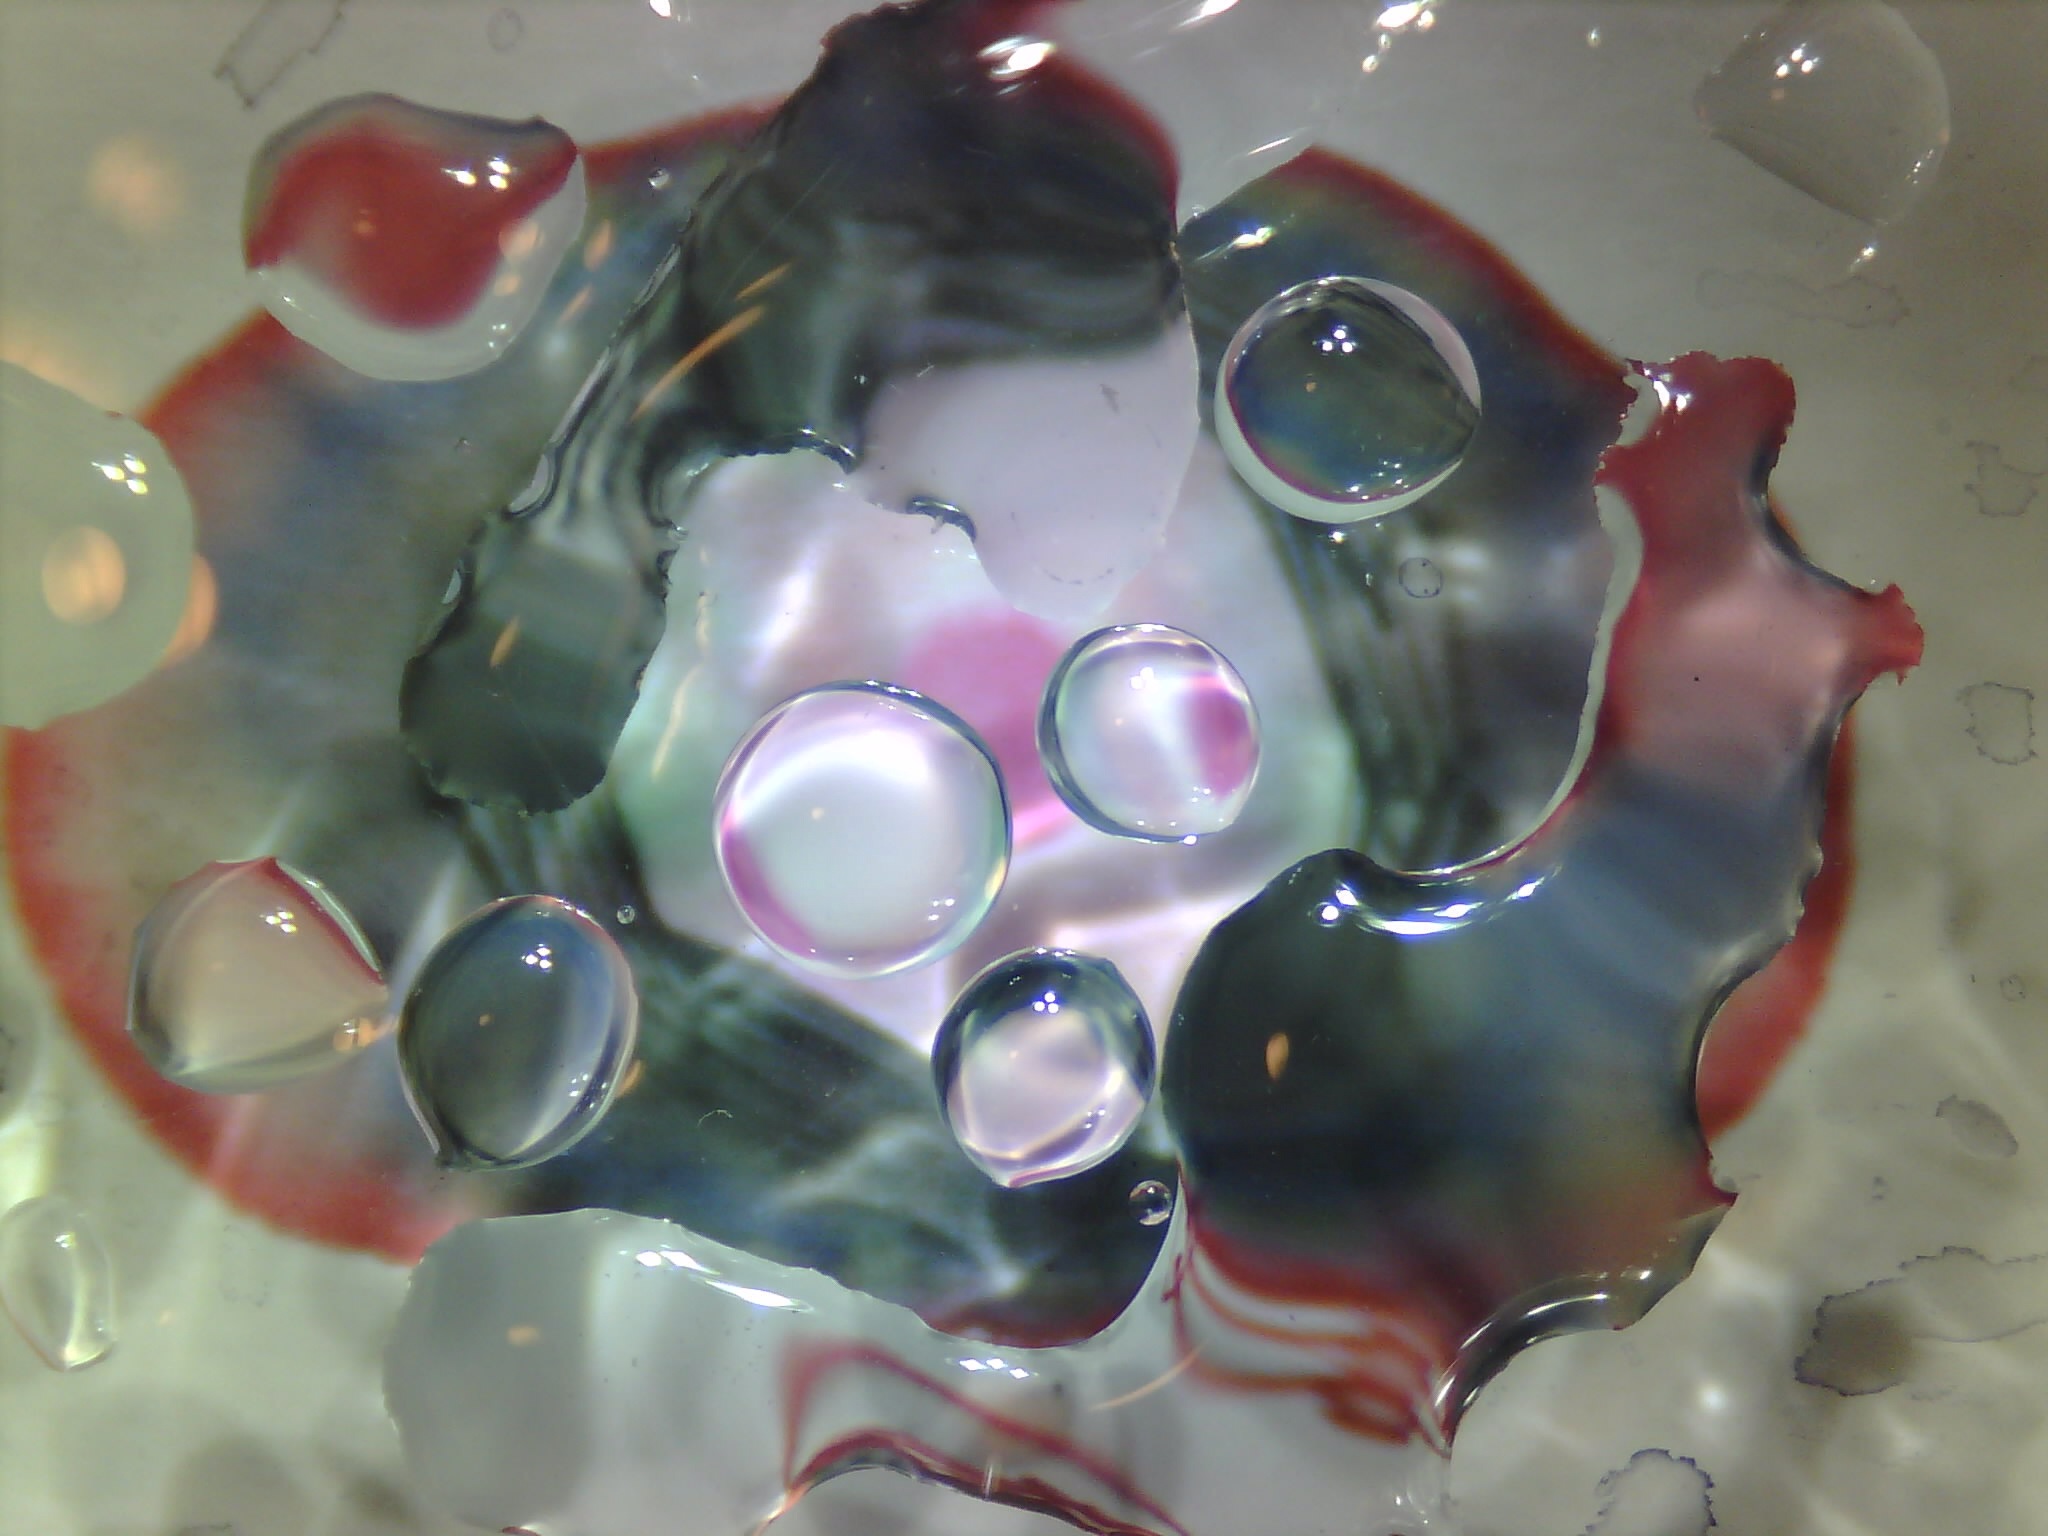
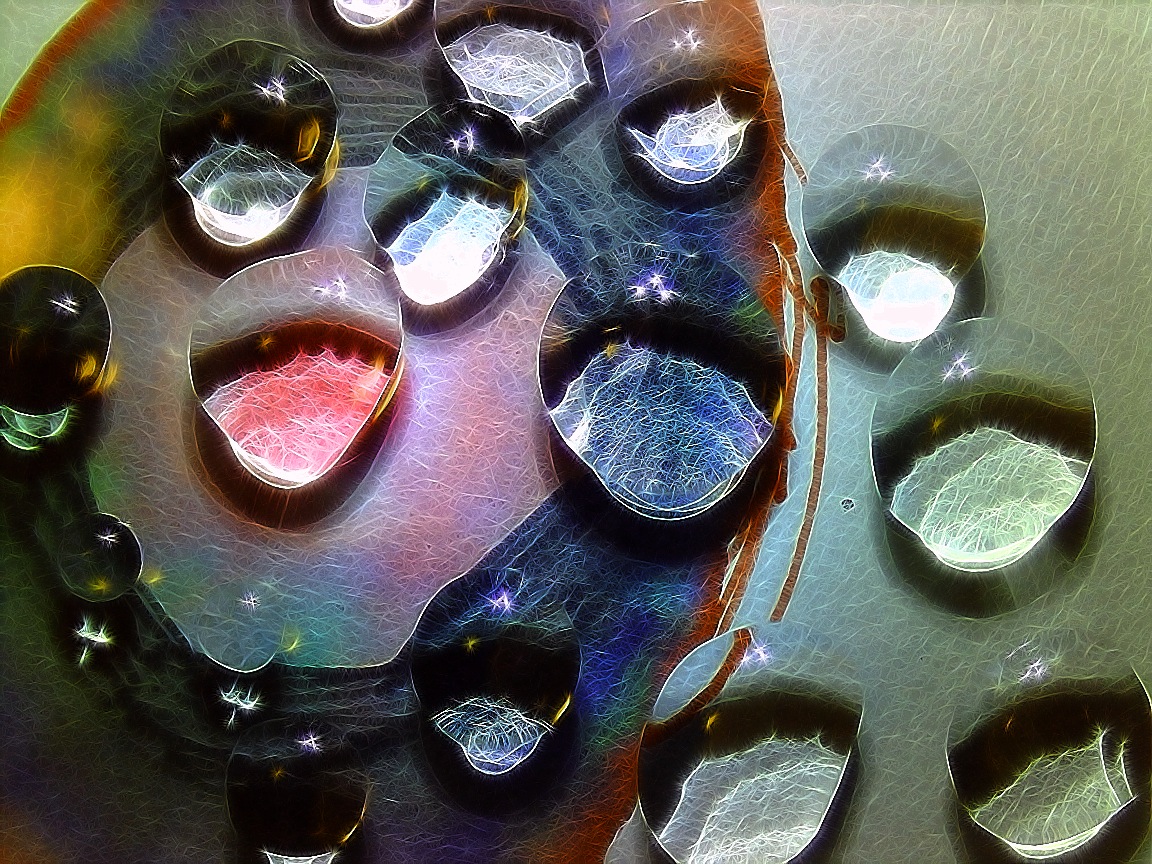
The bold lines on these shiny forms come from reflections of a thick black ring drawn on sharp white paper. Again, no manipulation or cleaning up – just one filter has been applied, this time a HDR effect in Snapseed was added to make the most of the rough texture on the paper.
Progressive Folio
Below I’ve collected a number of works created from this starting image captured on the Exo Lab.
How were they created? Workflows.
Each of these compositions is the result of extensive manipulation using a combination of iPad apps and hands-on tools. What you see is a range of complex combinations of techniques, applied in response to the creative process. At times drawings have been layered over the top of printed works, distortions created in apps, colour changes created with more apps, and sections cut away and re-photographed. Water bubbles have been enhanced, removed and repositioned. Imagery has been combined, deconstructed and rearranged. When you add powerful technology to your art-making tool kit, there are no limits to your creativity.
Final thought…
In schools, the art room is often considered the place where creativity resides, but in actual fact it lives within our students – let’s make sure it’s not separated by classroom walls. Get into the Science Lab at your school and see what you can find, repurpose or use creatively!
Last word… check out these inspirational works, including a comic on a hair. Yes, really.
For more multi-media art-making using creative workflows, click the link!
Social Share

One Comment


Great ideas. I have to get out the microscope and use it too. I wonder how the science teachers will feel about it coming down to use in the art room? I should show them this post first!