
Digital Drawing in Layers
 I’ve been working with students in Years 3-6 to produce images using apps for digital drawing, and I thought I’d share our adventures. Although I usually use student creations, as the works are derived from selfies depicting young learners, instead of describing the workflow using their faces I’m just going to share the image I produced working alongside them.
Layering is one of the concepts that we have really dug into, and developing this understanding on their devices crosses over into a whole variety of ways of making.
Even though there is certainly an ‘ease of use’ with the apps we explore, students need considered lesson design and to reveal opportunities to work between the opaque and transparent, to leverage surface texture, and experiment with a variety of expressive marks.
So here’s what we’ve been up to…
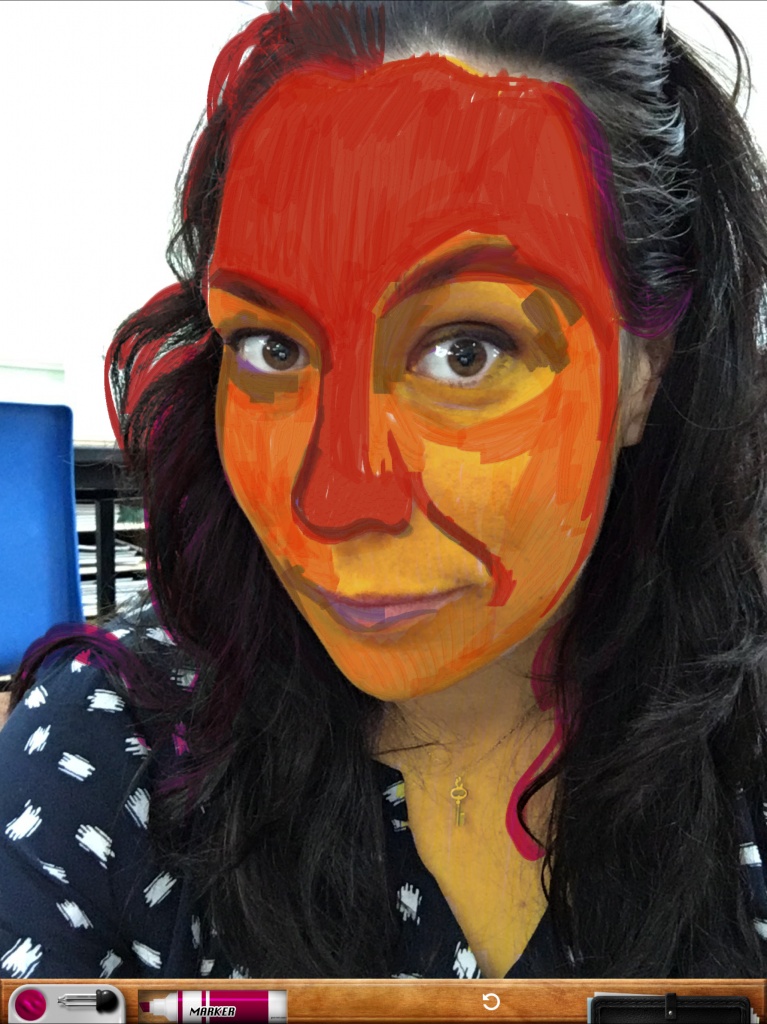
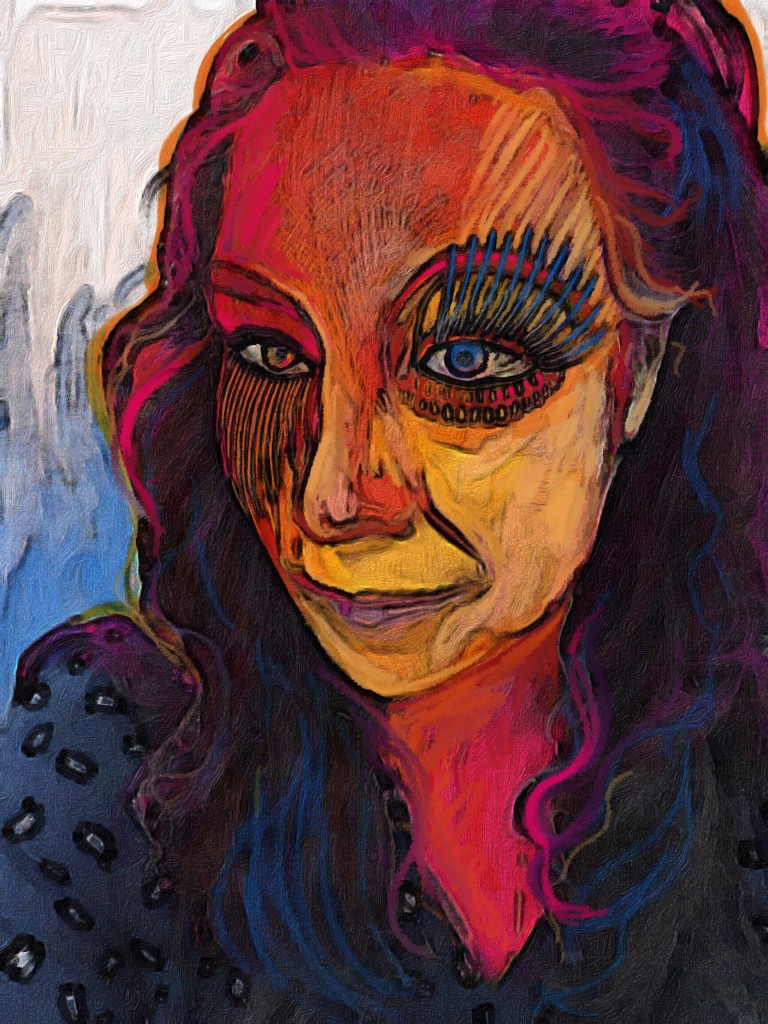
Starting with a selfie requires a lot more thinking than taking a quick ‘snapshot’ – this is an opportunity to talk about valuable photographic skills and visual language. We discussed the functionality of the camera, explored different angles of view and compositional strategies, then played with a number of facial expressions that we could choose between as a base layer for our work.

Moving to the next part of the process we talked about the tools in Art Set app, and made connections to these terms and the elements of art. After some exploration over the top of their selfie, the students discovered that some tools produced opaque marks and others were capable of producing thin, transparent marks. Some tools were more suited to fine, precision work, while others could work across large expanses effectively.
As a side, I’m using my iPad Pro with the Apple Pencil. The screen size and quality provides a great canvas to work on and the accuracy and responsiveness of the Pencil is an asset for this kind of task. Most of my students are using ‘dollar-shop’ stylus with their iPads, with some are using their fingers, or swapping back and forth between the two. I think it’s important to let them feel their way through the process of discovering what suits them, but making the advantages of ‘zooming in and out’ on the canvas clear is important in supporting them to achieve good quality results with this task.
Back to the task. Next, we deleted our ‘practice session’ and began again – one of the advantages of working digitally!
For this first layer, we used only those tools that allowed our photograph to say with us, shining through our marks as a guide for the next part of the process.
Very quickly the students realised that the coloured layers were changing as they mixed some hues with others, and they grappled for control – doing and redoing, undoing and doing again. This iterative approach is something that often develops fluidly when digital mediums are used – it’s the power of the undo button.
You could go further here working with colour theory or selective palettes. What about diving deeper into value by really looking to capture tonal changes in highlights and shadows? You could also capture a variety of lighting styles to create mood or expression in the original images and push those around…
The point is, this kind of task can be loaded with learning.
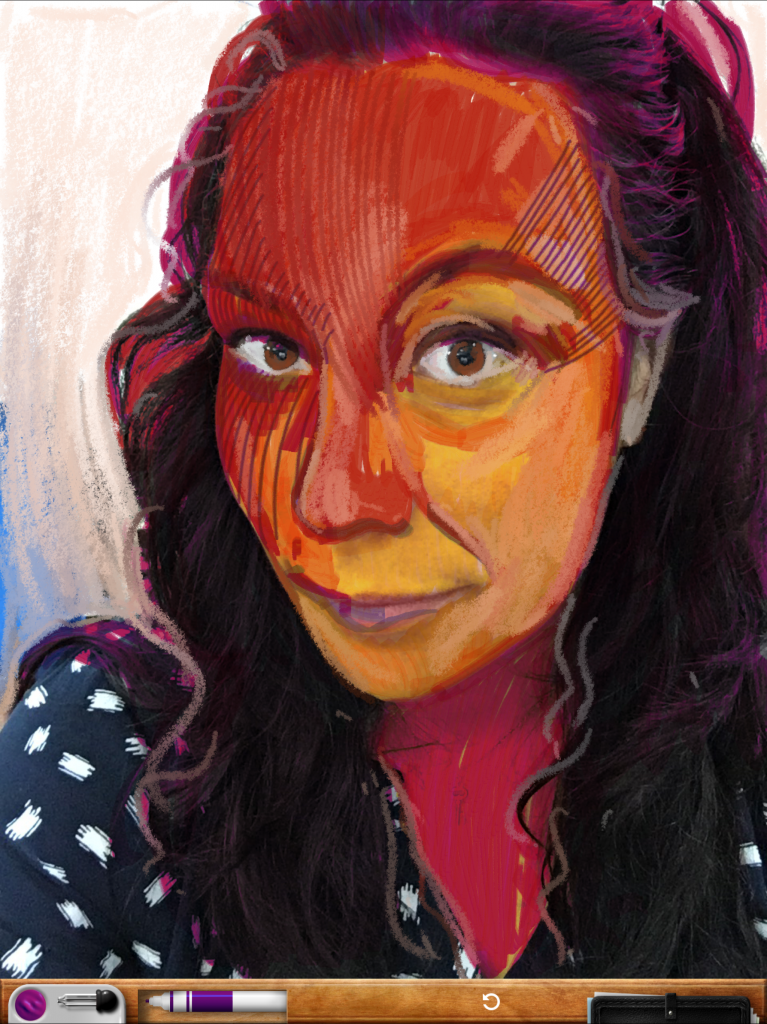
In the image above I’ve added some patterns across the face, while some students created contour lines, or exaggerated particular facial features like I’ve done with the eyelashes below. I’m sure you can see the potential to go a lot further with manipulation, distortion or combinations of visual elements here.
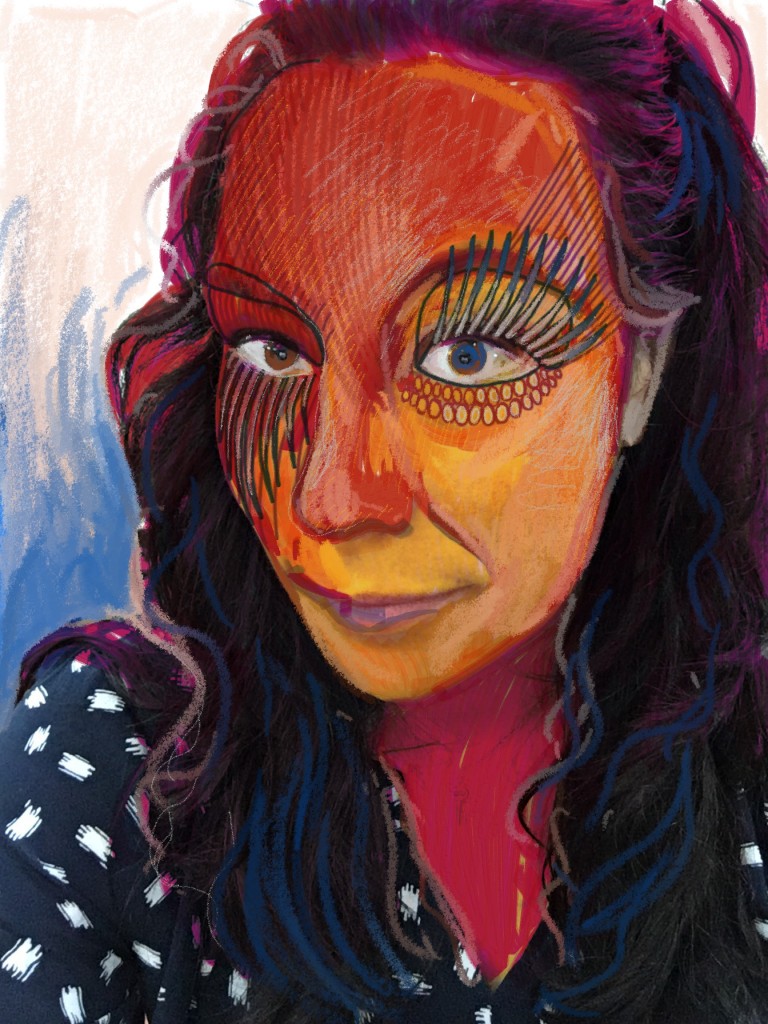
Working over a photograph in this way gives students an opportunity to really ‘learn to look’. Tracing over parts of the face is an engaging way to spend time purposefully exploring shape, form, etc. This kind of task also presents a valuable starting point for some of the less creatively confident learners – they are off and racing, rather than worrying about their first marks on a blank page.
But it is not easy. You’ll see that students will need to think through the process of image construction as the follow contours, manipulate the opacity of layers, use a variety of digital tools to create expressive marks, select colours that communicate, and more.
Of course, at any point you can get app-happy and add filters or print the image and work over the top…
Just as a side, I’ve used MegaPhoto app to convert this version into black and white so I can create an etching plate with the laser cutter, but this would also be a good one to work back over again with watercolour, a turps release…the sky is the limit!
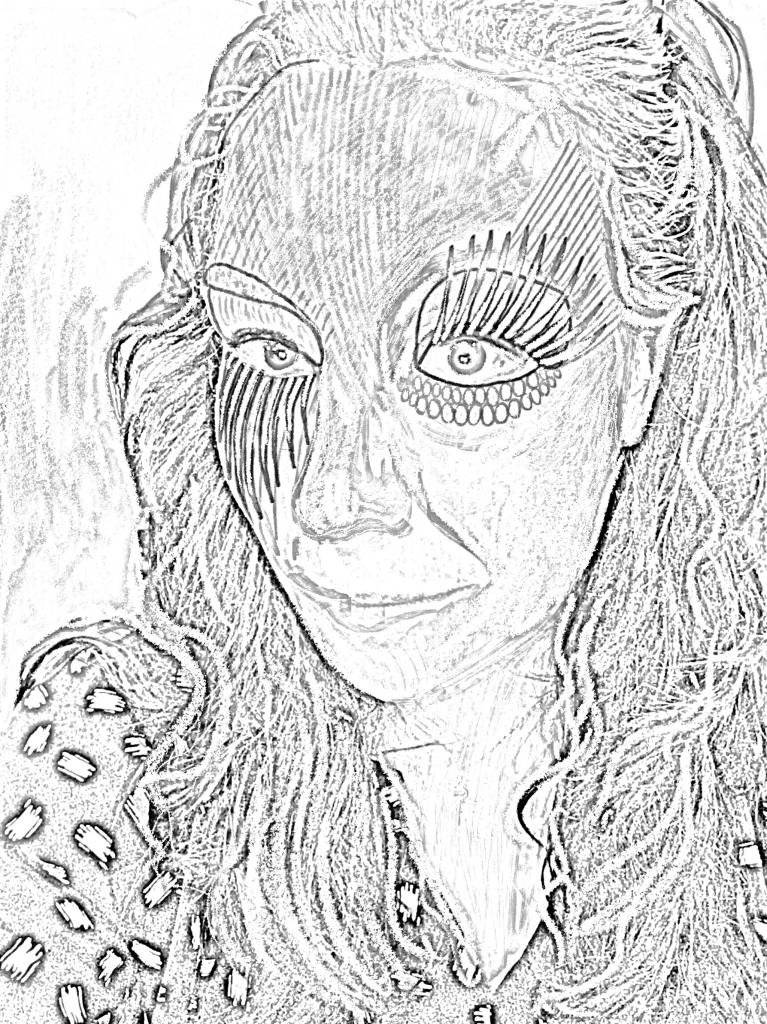
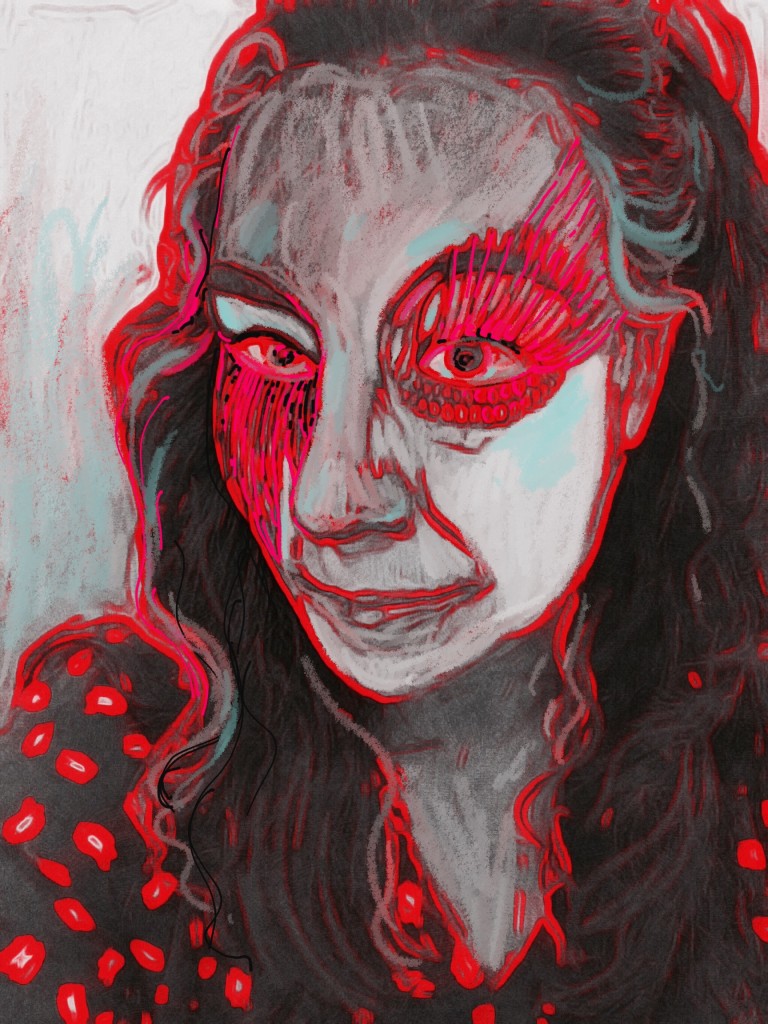
And since we are talking about layers, I thought I’d get a little ‘meta’ and bring the black and white image back into Art Set to re-work.
Just for fun.
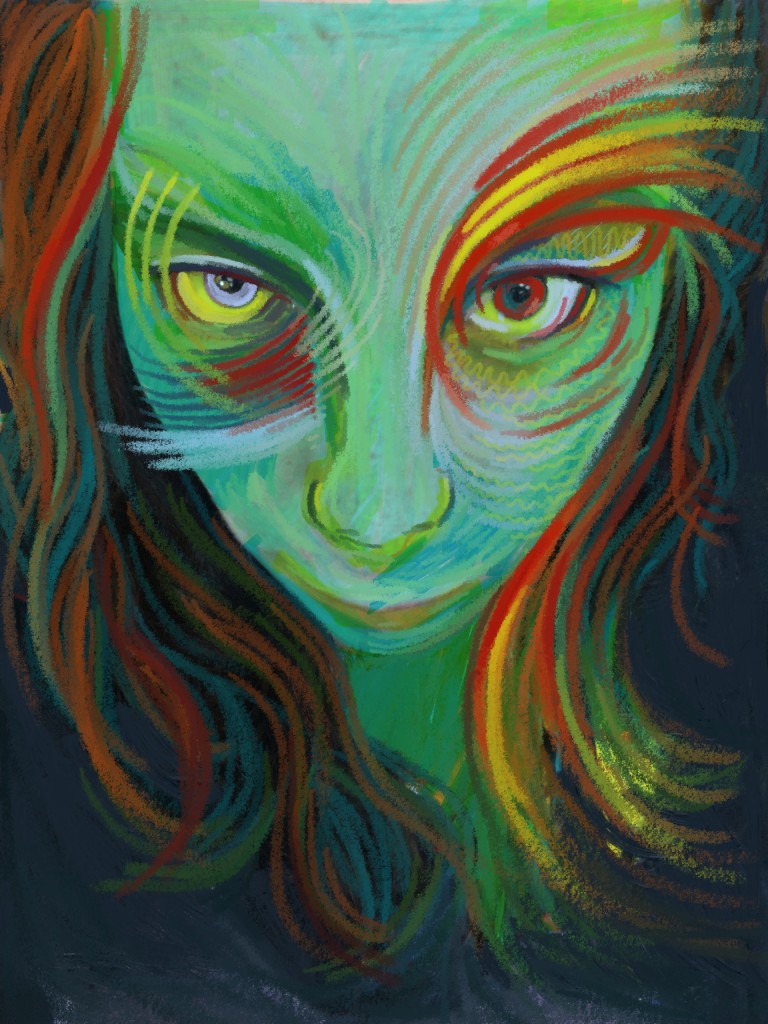
Last image and one more idea…
This work was created using the same process detailed here, however the overlaid drawings were used to bring together the face and animal features, seamlessly. A chameleon and a fighting fish were combined with my selfie, and you can see the initial composition of the photograph and the colour palette work with drawing techniques suggesting fins, scales, etc.
I’d love to see what you can do with these starting points in your classroom.


